Decking remains a popular feature for gardens, as an economical, affordable way of providing an area for eating or entertaining outdoors without the extra work of laying a concrete or stone patio, and it’s easier to keep looking tidy than gravel.
Laying Decking
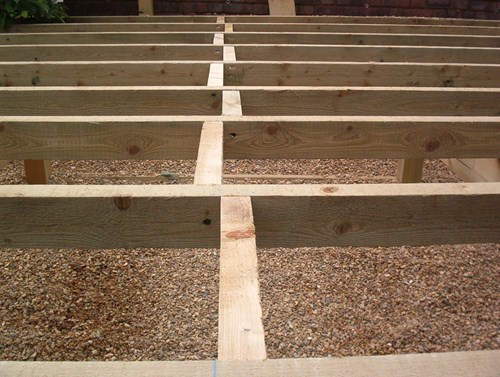
Decking is usually made of timber. Constructing a deck involves constructing a wooden subframe with joists at evenly spaced intervals. This needs to be raised above ground level on brick or concrete blocks, or using wooden posts, to allow water to drain away and help protect the wood from rot.
On top of this framework go the actual deck boards. The subframe should be planned to have a mild slope so that rainwater runs off.
Fitting the joists to the wooden beams of the subframe can be done by simply placing them on top and nailing the joists directly, however this increases the height of the deck. A method preferred by many installers is to use joist hangers for decks. These are metal connectors which provide a secure fixing and will keep the deck strong as the wood dries and shrinks, as well as preventing the joists from twisting. With either method of construction you need to fit short timber noggins to keep the joists evenly spaced over long runs and add rigidity.
Fitting Joist Hangers
Joist hangers for decks are made of metal, usually galvanised to protect them from corrosion. They usually have a simple face mounting that is fixed with screws or nails onto the beams forming the subframe. The joists then slot into the hangers and are secured with more screws or nails.
There are different types and sizes of hanger, so make sure you get the right ones for the job. They’re supplied according to the size of timber used and also the load they’re expected to carry. It’s also important to use the right fixings – if the screws used are too short the structure will be weaker. Use galvanized or stainless steel nails and other fixings to prevent them from corroding.
Next Steps
Once all of the joists are installed you need to add the uprights (newel posts) for any railings or balustrades. At this stage, you can also add any steps that may be needed to access the deck. Plan with care to get the treads and risers in the right place and level to avoid trip hazards.
With all of that done, you can proceed to lay your decking boards. Plan how you’re going to do this carefully, especially if you’re intending to lay the boards in a pattern such as diagonally or herringbone. Take account of any falls necessary to allow rainwater to run off too, especially if you’re using boards that have a grooved surface. It’s important when screwing your boards down to drill pilot holes and countersink them to avoid splitting the wood.
Finally, you need to apply a protective coating. Even if you’ve used pressure treated timber to construct the deck, using a preservative will not only guard against moisture but will also help prevent UV damage, which leads to timber looking grey. A quality preservative applied each year will help to keep your decking in good condition and looking at its best for many years to come.