

Owning a car requires an abundance of maintenance from time to time, and in the times we least suspect it cars can require immediate attention. Aside from having to change a tire, one of the most common issues you may run into with your vehicle is dealing with a dead battery. Especially if you live in areas that are either extremely hot or extremely cold, the life of a battery usually lasts only about three years. This kind of maintenance can usually be taken care of in the shop, but here are the steps for how to change the battery yourself, just in case you ever need to do so.
- The first step is to make sure your car is turned off completely. Then you want to take the old battery out. This can be accomplished with a combination wrench or a battery wrench, whichever you have handy. First you need to loosen the nut with the wrench and detach the black cable, or the negative cable. Once you’ve done this, you are going to want to turn and twist the end of the cable off. It can be rather difficult sometimes, and if that is the case you may need to purchase a battery puller.
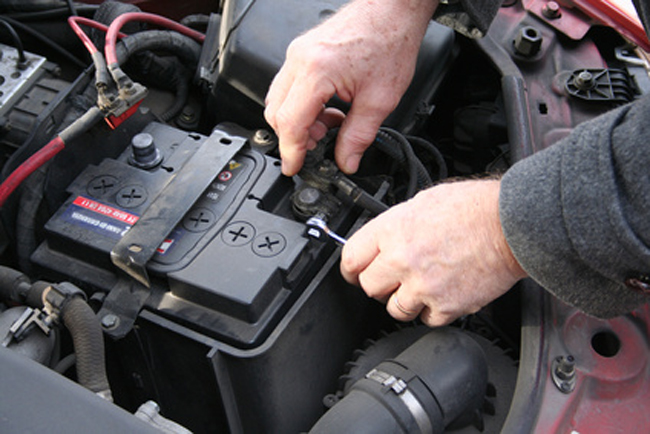
- Next, you are going to want to do the exact same thing with the red cable, or the positive cable. Remove the battery clamp with either a socket wrench or a combination wrench to free the whole battery.
- If the battery has a handle, use the handle to lift it out from the car. At times the battery can be heavy, and if there is no handle on it make sure to use both of your hands to lift it from underneath with a solid grip.
- From here you are going to want to clean any corrosion or leaking that may have happened in the area behind the battery. You can do this with a specific battery cleaning solution or soapy water, as you won’t want to use a product that is flammable. Especially when dealing with vehicles and machinery, it is really important to notice these things to prevent any accidents. Once the general area is cleaned, give it a couple minutes to dry completely. You will also want to clean the battery connectors with the same solution to ensure that they are in the best condition that they could be in for the new battery.
- Next, put your new battery inside the designated area. Make sure that it is in there correctly, and then secure it with the clamps to hold it down. If you have any anti-corrosion solution, now would be a good time to spray down the terminals as well.
- By doing the reverse method for taking the battery out, attach the positive red wire first before you work with the negative black one. Tighten them up with your wrench, and then give the whole thing another look over. Before calling the job complete, it is highly important to allow a few extra minutes to confirm that every part of the battery is secure and tightened. You can do this by gently pulling on the battery back and forth to see how stable it is.
- Close the hood of your car and start it up to see if it works. If it doesn’t, you may come across an issue with a weak connection in the electrics, and if that is the case you should take it in to your local dealership or repair shop. If your car starts up with sounds as it normally does, you have successfully changed your battery.
Written by Marc Laferierre, owner of Dents Unlimited. Dents Unlimited is a full service auto repair shop in Columbia, MO